
TealPrint
User's Manual
Program Version 2.10
Last Updated: November 25, 2008
Table of Contents
Introduction
Contents
Installing
Chapter 1 – Overview
1) TealPrint Main Application
2) Printer Drivers
3) HotSync Spooling Manager
4) Bitmap Print Fonts
Chapter 2 – The Main Screen
Driver
Driver Settings (wrench
icon)
Driver Info (question
mark icon)
Paper
Graphics Mode
Text Mode
Settings and Options
Print Tools
Text
Clipboard
Screen
Data
Chapter 3 – Printing from Standard Applications
Datebook
Address Book
To-Do List
Memo Pad
System Info
Tests
Chapter 4 – Settings and Options
Print As Raw
Text/Graphics
Print Region (X Y W H)
Text Options
Horizontally Center
text
Vertically Center text
Eject Paper after
printing
Wrap Long Lines
Break lines on word
bounds
Justify
Graphics Options
Landscape
Eject Paper
Invert Colors
Smooth Jaggies
Horizontally Center
Vertically Center
Keep Aspect
Integer Scale
Word Break
Word Wrap
Justify
Font
Approximate Font Size
Font Faces
Font Size
Chapter 5 – Driver Settings
Show status when
printing
Beep status
Unprintable margin
Connection:
Chapter 6 – HotSync Printing
How to Hotsync Print
1) Select the HotSync
Spooler Print Driver on the Palm
2) Print
3) HotSync
HotSync PC Spooler Driver (on Handheld)
Left and Top Offset
Show status when
printing
Beep status
Flush queue before printing
Queued Pages
Reprint Last Job
Flush Queue
PC Spooler (on Desktop PC)
Changes from previous versions
Chapter 7 – Direct IR / Serial / Parallel Printing
Drivers
Cables
Infrared (IrDA) Printers
PC Serial Printers
PC Parallel Printers
Chapter 8 – TealPrint-Aware Programs
Chapter 9 – Non-TealPrint Aware Programs
Chapter 10 – Using Graphic Fonts
Graphics Resolution
Chapter 11 – Imbedding Images in Text
TealPaint Tags
TealNotes
Chapter 12 – Printing Tips and Tricks
Aborting a Print Operation
Printing in Grayscale
Printing Color
Appendix A – Troubleshooting
Appendix B – Revision History
Appendix C – Contact Info
Appendix D – Registering
Appendix E – Legal Notice
Introduction
TealPrint
is a universal printing system for Palm OS that supports both graphics and
native text. It provides stand-alone printing functionality for screen dumps,
printing from the system text clipboard, and printing data from the system
MemoPad, ToDo List, Datebook, and Address Book applications.
In addition, it provides an easy but flexible standard interface for printing from third-party applications who which to add printing functionality to their programs.
The TealPrint system supports HotSync printing to any Windows-supported printer through a desktop PC. This is the preferable solution for most customers. It can also support direct connections to serial, parallel, and infrared printers with appropriate drivers and/or supported cable adapters. If you require a direct printing solution, please confirm that your printer is supported and test your connection before registering TealPrint.
Contents
This
archive contains the following files:
Program
files:
TEALPRNT.PRC The
TealPrint program file
TP_CANON.PRC Canon bubblejet graphics print driver
TP_EPSON.PRC Epson FX and compatibles print driver
TP_SIPIX.PRC Sipix A6 Portable printer driver
TP_HP.PRC HP PCL-compatible printer
driver
TP_MSTIV.PRC Extech MST-IV thermal printer driver
TP_2000T.PRC Extech 200T thermal printer driver
PCSPOOL.EXE HotSync printing PC-Spooling Manager
COURI_MD.PRC Courier
medium-sized bitmap printer font (fixed space)
ARIAL_MD.PRC Arial
medium-sized bitmap printer font (sans serif)
TPSETUP.EXE Windows easy installer
Document
files:
PRNTDOC.PDF This
document in Adobe Acrobat (PDF) format
PRNTDOC.HTM This document in HTML format
(sans images)
PRNTDOC.PRC This document in TealDoc format
REGISTER.HTM TealPoint Registration form in HTML format
REGISTER.TXT TealPoint Registration form in text format
Installing
Under Windows
Run TPSETUP.EXE to install the necessary
files. The installer will install the
necessary files to your handheld and will also install a HotSync conduit to the
Palm Desktop to automatically launch the PCSpooler application when spooled
print data is available. You must use
this automatic installer if you wish to “HotSync print” to a printer connected
to your PC.
Under Other Systems

For
other systems, use the Pilot installer to manually install the program file TEALPRNT.PRC. It will appear on the
Palm Computing device after the next HotSync.
This manual is also provided in this archive as the PalmPilot document PRNTDOC.PRC, which can be installed and
viewed with our other application TealDoc.
The Palm
installer appears as an icon on the left side of the Palm Desktop program. Instructions on how to use the Palm
installer are in the Palm Handbook that came with your Pilot, PalmPilot, Visor
or WorkPad.
You may also manually install using the Pilot
Installer under Windows, but the Palm Desktop spooling conduit cannot be
installed manually, so you should run the automatic installer (TPSETUP) if you
wish to Hotsync-print. Hotsync printing
is only support under Windows.
Direct Printing Drivers
If you wish to print directly to a printer via a
Infrared, Serial, or Bluetooth connection, you may also need to install an
appropriate printer-specific driver for the printer you wish to support. Various printer drivers can be found in the
“printers” folder of this archive, and can be installed manually with the Palm
Installer.
A printer-specific driver is needed to directly
print graphics, text with selectable fonts, or to print text on printers which
do not support raw text. A
printer-specific driver is NOT needed if you only intend to print though the
HotSync cradle to a printer connected to your PC.
Graphic Fonts
Once you have graphic printing working, you may also
wish to install some bitmap print fonts.
These fonts can be fairly large memory-wise, and can only be used when
printing text in graphics mode. Two
fonts, Arial and Courier, are included in this package in medium sizes. Further instructions on how to select and
use bitmap text fonts appear later on in this document.
Chapter 1 – Overview
The
TealPrint printing system consists of five major components, the TealPrint Main
Application, Printer Drivers, Bitmap Print Fonts, HotSync
Spooling Manager, and Host Applications.
1) TealPrint Main Application
![]()
The TealPrint main application
appears as an icon on your applications launcher screen. It controls all print operations and
communications with the printer drivers.
It is also offers many built-in printing tools such as screen dumps,
printing from the clipboard, system profiling, and printing data from the four
main Palm applications.
2) Printer Drivers
![]()
To communicate with individual
printers, TealPrint uses printer-specific modules known as printer
drivers. TealPrint includes two
built-in drivers (Generic Text and HotSync Spooler),
while the others are external files that you can optionally install. Printer drivers are actually small
applications that know how to talk to a particular printer in its own digital
language. While printer drivers appear
as icons on the applications launcher screen, you rarely, if ever, need to run
a printer driver directly.
When printing to a printer directly
connected to your organizer through cable or infrared link, you need a driver
that matches your printer. When HotSync
printing, however, you should always use the HotSync virtual printer driver HotSync-Spooler, which will always do the correct
translation using Windows printer drivers.
3) HotSync Spooling Manager

When HotSync Printing, the
HotSync Spooling driver doesn’t actually communicate with your printer, but
instead saves a file in memory that gets printed the next time you
HotSync. The HotSync Spooling Manager
(PCSPOOL.EXE) reads the spooled data during HotSync, interprets the file on the
PC, and translates the data into Windows calls, sending the information to your
default Windows printer. The advantage
to this approach is that all the features of Windows printers are fully
supported, including color and graphics support, and no special cabling is
necessary.
4) Bitmap Print Fonts
TealPrint supports printing text,
either as native printer fonts or as graphics sent to the printer. In the former mode, raw text is generated
and word-wrapped by TealPrint and sent to the printer as simple text. The font and style of the text is left up to
the printer, which typically uses a fixed-space font such as Courier, rendering
text resembling the output of a typewriter.
Printing in graphics mode, however,
allows TealPrint to render the text itself, giving the user more flexibility in
the style and sizing of the text. The
standard PalmPilot screen fonts are far too low resolution for most purposes,
however, looking very jaggy when printed at reasonable sizes on at printer
resolution. Bitmap Print fonts are
higher resolution, allowing printing in graphics mode and better-looking
results.
5) Host
Applications.
While TealPrint offers many
built-in printing functions, it really shines when directly supported by an
external application. TealPhone,
TealDoc, and TealPaint already offer direct TealPrint support, while the list
of third-party applications that support TealPrint is constantly growing.
Chapter 2 – The Main Screen
Run
TealPrint by choosing its icon from the Palm applications screen. The TealPrint
main display screen shows the current configuration and offers universal tools
for basic printing. It also allows one
to set current modes, adjust basic print settings, and change driver-specific
settings.
At the top of the main TealPrint screen, the following selections are adjustable:
Driver
This control lets you set the current active printer
driver, from the list of all currently installed printer drivers. Next to it are two related buttons:
Driver Settings (wrench icon)
Allows setting of driver-specific options, like communications mode and speed.
Driver Info (question mark icon)
Displays
information about the active driver.
Paper
This control lets you select paper sizes or change the
default margins for all paper sizes supported by your printer driver. You may
need to change this option when, say, printing an envelope or on odd-sized
paper if the printing application does not provide this option.
The Paper Sizes dialog lets you select the paper sizes and margins to be used for printing operations. The available paper sizes vary from printer driver to printer driver.
An additional option, Manual Feed, is present on this screen. When checked, this option causes a confirmation dialog to come up before each page is sent to the printer. This is option is useful when sheets need to be manually fed into a printer, or when a printer needs a delay to reset back to its normal state between separate printing operations. This is sometimes necessary when printing via Infared to some printers to avoid lost pages which may otherwise be sent to the printer when it is not yet ready to print a new page.
Graphics Mode
Lets you select the current graphical printing mode, as
defined by the printer driver. Typically, this setting is used to change
graphic printing resolution or enable special printing modes such as color,
transparency or photo printing. This option is not available if the printer or
printer driver does not support graphics, and only affects printing in graphics
mode.
Text Mode
Lets you select the current text-printing mode, as defined
by the printer driver. Typically, this is used to support printing with
different internal printer fonts or for landscape text printing, if supported.
If the current printer or printer driver does not support printing in a raw
text mode, this option is not available. This option does not affect text
printed in graphics mode.
Settings and Options
Adjusts
the current default graphic and text printing settings. See the next section for description of
available settings.
Print Tools
Standard print tools allow you to easily print data from common sources or the standard PalmOS PIM databases.
Text
Brings up a text-editing screen that lets you enter, edit,
and print some short text. Perfect for a quick note or label. Simply type in some text or use cut and
paste to insert it from the system clipboard.
Then select “Print” to print it.
Clipboard
Prints any text that has
previously been "Copied" or "Cut" to the Palm text clipboard
from another application. Useful to print text from any program that supports
cut and paste.
Screen
Allows dumping the PalmPilot display to the printer from
within another program. Requires a printer and printer driver that supports
graphics or HotSync spooler.
Data
This button accesses
controls for printing data from the Standard Palm Datebook, Address Book,
MemoPad, and To-Do List, applications and for printing several internal test
images. See the next chapter for more
details on printing from the standard built-in applications.
Chapter 3 –
Printing from Standard Applications
TealPrint includes built-in printing support for the four basic Palm PIM applications. You can access these tools from the "Data" button on the main screen.
Datebook
Allows you to print an agenda of items for any specified range of days. You can optionally hide untimed events, repeating events, or days without any events. Simply specify a date range of items to print. Notes from datebook items can be printed as well.
Address Book
Prints the full standard contents of any single address
book entry, or prints a simplified phone list (name plus primary number) for
all the entries in an entire category.
To-Do List
Prints all To-Do items, or all items within a selected
category. To-Do items can be filtered
by a range of due dates, and can include or exclude entries with no due
date. Choose “Anytime” to print items
with any due date.
Memo Pad
Prints the full contents of a selected memo
System Info
Prints detailed system
information including user name, processor, operating system version, memory
heaps, and all files stored in main memory along with their size, properties,
attributes, and version numbers.
Tests
Prints
four various sequences designed to test special effects and features in the
TealPrint's graphics and graphic-text subsystem.
Chapter 4 – Settings and Options
The
settings screen allows you to set various default options for printing text and
graphics. These options affect the basic printing tools in TealPrint and apply
to most other programs as well who print through the TealPrint interface.
Programs that perform more task-specific printing tasks may choose to override
some or all of these options with its own preferences or options.
Print As Raw Text/Graphics
This setting allows you to
select whether the printer prints the incoming page in graphics mode or as
native printer text. Raw text is much faster for printing basic text documents,
takes much less memory when printing, but limits you to the standard printer
font and does not support graphics or most effects. Graphics mode also supports
graphics, but can be very slow and requires TealPrint bitmap fonts to be loaded
onto the handheld for best results.
Print Region (X Y W H)
Lets you scale an image down
from its default print size. Normally, TealPrint considers the full region on
the paper within the margins to be printable. You can shrink this printable
region, and any printed imagery or text will be resized to fit the new space. Use this option to easily move and scale
printed text or graphics on a page.
Coordinates are relative to the upper left corner of the page.
NOTE: When printing in graphics mode, the text will shrink to
fit the new smaller space, re-mapping fonts if necessary. When printing as
Text, the text will re-wrap to fit the smaller space but the text size will not
change. To change text size, you must
print in graphics mode and set a different font in Gfx Options.
Text Options
The following special options are available when printing
in text mode.
Horizontally Center text
Centers animage or block of
text horizontally on the page. To have an effect, the printable area has to be
set to less than a full page width.
Vertically Center text
Centers a image or block of
text vertically on the page. To have an effect, the printable area has to be
set to less than a full page height.
Eject Paper after printing
Sends a command to eject
paper out of the printer after printing, if optional. Some printers, however,
always automatically eject a page after printing.
Wrap Long Lines
When printing graphic text,
this option allows long lines to wrap to the next line. When not checked, long
lines are truncated.
Break lines on word bounds
When printing graphic text,
this option forces line breaks to occur only on word boundaries. When this
option is not checked, lines may wrap anywhere.
Justify
Centers or left or
right-justifies graphic text.
Graphics Options
The following special options are available when printing
in graphics mode.
Landscape
Prints the image in
Landscape mode (sideways) rather than portrait
Eject Paper
Sends a command to eject
paper out of the printer after printing, if optional. Some printers, however,
always automatically eject a page after printing.
Invert Colors
Prints the page as a black
and white negative
Smooth Jaggies
![]()
![]()
Rounds the corners of line drawings or text to help get rid
of graphic "jaggies". This option slows printing considerably,
however, and will darken or distort images with shading or dithering. Smoothing only functions on graphic text or
portions of an image that are black and white.
Horizontally Center
Centers a image or block of
text horizontally on the page. To have a measurable effect, the printable area
has to be set to less than full-page width.
Vertically Center
Centers an image or block of
text vertically on the page. To have an effect, the printable area has to be
set to less than full-page height.
Keep Aspect
Normally, bitmap images are
scaled vertically and horizontally to keep proper proportions. Without this
option checked, the image will be stretched to fill all available space even if
the image is stretched out of proportion.
Integer Scale
When this option is set,
images are scaled to maintain constant pixel sizes, improving the look of line
drawings and detailed images, even if images may print smaller than the total
available area.
Word Break
When printing graphic text,
this option forces line breaks to occur only on word boundaries. When this
option is not checked, lines may wrap anywhere.
Word Wrap
When printing graphic text,
this option allows long lines to wrap to the next line. When not checked, long
lines are truncated.
Justify
Centers or left or
right-justifies graphic text.
Font
When printing text in graphics mode, TealPrint allows you to choose which bitmap font to use. Click on the drop-down triangle next to the font name to bring up the font selection screen.
Approximate Font Size
When printing text in graphics mode, TealPrint will scale the font in integer increments to match the requested font size as closely as possible.
Font Faces
Four standard Palm fonts are available (only three on
Pre-III PalmPilots). However, these fonts are designed for the Palm screen and
are small when printed. Installed TealPrint font files expand the choice of
available fonts with higher resolution fonts designed for printing.
Font Size
Graphic
fonts can be printed at some multiple of its minimum size, where each pixel of
the font corresponds to a pixel of the printer output. Thus, when printed at its smallest size, a
font appears at its highest resolution; the full resolution of the printer.
When text is printed at a multiple of this base size it appears larger, but
will show pixel "jaggies" when blown up too large. The "Smooth
Jaggies" option can be used to reduce this effect, but looks better with
some fonts than others.
Chapter 5 – Driver Settings
Printer
driver options can vary from driver to driver. In general, here are some common
settings that tend to be present in drivers we offer:
Show status when printing
Shows printing status at the
top of the current display. You may want to turn this off during a screen dump
if the status bar appears in the printed image due to low memory.
Beep status
Plays in intermittent
"click" while printing to indicate printing.
Unprintable margin
Offsets an image left and upwards to compensate for an inherent offset built into a printer’s paper-handling mechanism. Use this, for instance, printed margins appear larger than those set in TealPrint.
Connection:
Selects the port that will be used to connect to the printer. Typically, selections include Infrared or serial ports. If device-specific PalmOS virtual serial devices are present (including Bluetooth), these will appear as well.
NOTE: All available virtual serial connections
will be listed, but not all will be suitable for printing. For instance, a virtual serial Infrared
connection may not be the same as a IrDA direct connection as they use
different protocols, even though both use the Infrared port hardware. Compatibility depends on what the printer is
designed to receive, and some experimentation may be necessary to find the
proper connection.
Connection Properties:
Connection properties adjust the communications properties for the selected port, including speed and handshaking protocols. Not all items on this screen apply to all ports. For serial connections, check your printer hardware manual for proper speed and handshaking settings.
Baud Rate Sets the speed of communication to the printer.
Send Slow Slows the output of data through the serial port in discrete packets to avoid data loss associated with some serial-to-parallel adapter cables.
HW handshake Enables hardware CTS handshaking for serial communication
XON/XOFF Enables software handshaking for serial communication
Parity Set bit parity for serial communication
Chapter 6 – HotSync Printing
HotSync printing allows you to easily print to any Windows-supported printer with no special cables, drivers, or setup. Instead, it uses the PCSpooler program on your desktop PC to shuttle data to your printer. It is the easiest way to print data from your handheld.
Most
printing operations happen immediately when selected. HotSync printing is the
exception. Similar to the way many offline 'mail' applications work, HotSync
printing lets you print your pages on the handheld ahead of time, sending them
to the printer later only when you next HotSync.
How to Hotsync Print
To print an image or document through the HotSync cradle:
1) Select the HotSync Spooler Print Driver on the Palm
On the handheld, select the HotSync PC Spooler printer driver. It is one of the built-in drivers that is always available.
2) Print
Perform a print operation. The data won’t actually print yet, but will be written to a file (called the “print queue”) on your handheld.
3) HotSync
To send a queued print-job to the printer, simply HotSync your handheld.
NOTE:
For HotSync printing to work, you MUST have
installed TealPrint using the TPSETUP installer program, which installs a Palm
Desktop component that automatically launches the PC Spooler program on the
handheld whenever you HotSync. You can
also manually run PCSpool.EXE prior to each HotSync (as was required in older
versions of TealPrint), but this is rather inconvenient.
HotSync PC Spooler Driver (on Handheld)
The
Driver Settings for the HotSync Spooler driver contains special settings for
adjusting the printing offset and spooling queue for jobs sent to the desktop
for printing.
Left and Top Offset
The left and top offset values let you specify the left and top margins of the paper where the printer starts to print. When you specify a print margin in the paper settings, the margin specified here is subtracted off to compensate for the printer offset. Thus, a 1-inch margin will really print at 1-inch, not 1.25 inches.
Show status when printing
Shows printing status at the
top of the current display. You may want to turn this off during a screen dump
if the status bar appears in the printed image due to low memory.
Beep status
Plays in intermittent
"click" while printing to indicate printing.
Flush queue before printing
When set, this option clears
the print queue before each printing operation. This is useful if you are trying different print operations but
only wish to send the last print job to the printer the next time you
HotSync.
NOTE: This option was needed in older versions of TealPrint to
clear the print queue after printing, but is no longer necessary in current
versions, as the queue is cleared automatically after printing.
Queued Pages
This item shows the number of pages currently queued to print and the total size (in kilobytes) used by the print queue. Note that the print queue also stores the last print job sent to the printer, and this will be included in the total size used unless you flush the buffer or start a new print job.
Reprint Last Job
Press this button to re-queue the last print job to print again at the next HotSync.
Flush Queue
Press this button to clear the print queue, deleting any data, printed or not.
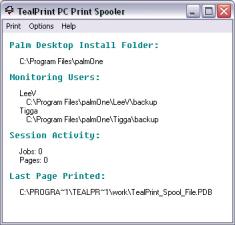
PC Spooler (on Desktop PC)

When you install TealPrint using the TPSETUP automatic installer, the PCSpooler will automatically be launched whenever data needs to be printed.
You can also launch the PCSpooler manually to change settings from its shortcut in the your Windows Programs menu.
The following menu options are available:
Display Status
This displays current program status, including monitored folders and printed jobs
Scan for missed jobs
This option searches the backup folders of all HotSync users looking for unprinted print jobs that may have been missed because the PCSpooler was not running during HotSync. This option was needed in older versions of TealPrint but should not be needed if the TealPrint Palm Desktop conduit was properly installed using TPSETUP.
Reprint last job
Reprints the last print job
Save last job as BMP
If the last print job was a graphic, this option allows you to save it as a BMP file.
Open program minimized
Opens the program in minimized mode. Useful primarily for older versions of TealPrint.
Pause for confirmation between pages
Puts up a confirmation dialog between pages when printing, allowing you to manually insert paper prior to each page.
Use default printer
If this option is set, printing occurs automatically using the default Windows printer. If unchecked, a dialog will pop up before each print job that requests a printer be selected.
Print to screen only
If this option is set, jobs will be sent to the PCSpooler window for preview only, but not to the printer.
Changes from previous versions
Older versions of TealPrint required you to manually launch the PCSpooler before HotSyncing. This is no longer necessary, as a new Palm Desktop conduit automatically launches PCSpooler as needed. This conduit only gets installed if you use the TPSETUP program to install TealPrint; it does not get installed if you manually install the PRC files to your handheld.
If you have the conduit installed (it will appear in your Palm Desktop “Custom” settings) then you want to make sure the PCSpooler is NOT already running when you HotSync, or you may end up printing two copies of every job.
Chapter 7 – Direct IR / Serial / Parallel Printing
Drivers
When HotSync printing through your PC, TealPrint uses Windows printer drivers to translate TealPrint print commands to a language your printer can understand. When direct printing, however, you’ll often need a printer-specific printer driver on your handheld to perform the same function. A number of TealPrint drivers are available for common printer languages. Even if your printer is not listed, however, most printers support raw-text printing using the built-in Generic Text printer driver.
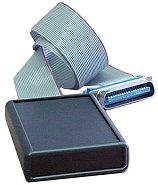
Cables
In your printer does not come equipped with Bluetooth or a built-in Infrared (IrDA) port, you’ll also need cabling and/or adapters to connect directly to a printer.
NOTE: Please don't experiment with your own cables or adapters unless you know what you're doing. While creating your own cables may be pretty straightforward to someone with a technical background, don't rely solely on the information below if you're at all unsure about what will or will not work.
Infrared (IrDA) Printers
Most printers that have a built-in IrDA port do not require any additional cabling. TealPrint printer drivers support IR communication in three different connection speeds, and two basic flavors:
Direct IrDA
This is the most common IR connection method, and relies on the standard printing protocol designed for laptop computers.
Infrared IrCOMM
Under PalmOS 4.0 or higher, and additional IR connection is available, though its name can vary from device to device. Typically called “Infrared” or “IrCOMM”, this second IR connection method uses a low-level serial protocol across IR.
NOTE: Some “IR-capable” printers (such as the HP PhotoSmart series) are designed to communicate only with specific devices like digital cameras, and use their own proprietary protocol that is not compatible with either industry standard. For these devices, printing over IrDA is not supported.
For printers without built-in IrDA support, you can purchase an external IR adapter to add this capability. See "PC Parallel Printers" below for more information.
PC Serial Printers
Serial printers, though less common than parallel printers, are generally easier to connect to your handheld than Parallel printers, as most Palm handhelds (except Sony) have serial ports in their base. As long as the serial printer can operate at a baud rate supported by your organizer, connection simply involves connecting the proper signals together.
As Palm HotSync connectors are not generally available, your best bet is to run a cable between your HotSync cradle and your printer, and simply print with your handheld in the cradle. If you normally connect with a USB cable or cradle, you will need a serial HotSync cable or cradle instead.
To connect a serial cable, you need a converter that will connect the DB9-Female connector at the end of the HotSync cable to your printer, routing the signals correctly. The exact wiring depends entirely on the printer.
You can also take advantage of an existing serial cable for your printer, which is designed to plug into the DB25-Male or DB9-Male serial cable at the back of your PC. If you have one of these, then all you need is a short DB9-to-DB9 Null modem cable to go in between the HotSync cradle and the printer cable. The null modem cable is necessary to swap the send a receive lines along the way, so that the PalmPilot looks like a PC, rather than a peripheral that plugs into a PC.
If you're lucky, you can find a null modem cable with two DB9 Male connectors. If not, you might need to also get one or two DB9 gender changers and/or DB9-to-DB25 serial adapters in addition to a null modem cable with different connectors. You probably won't find the complete cable at your local software store, but you can probably find it online at somewhere like www.cablewholesale.com, or you can make one yourself with about $5 in parts. If you purchase a cable, be sure to check a wiring diagram for the cable first before purchasing it or hooking it up to your Palm.
Once you have a DB9M to DB9M null modem cable, plug in your HotSync cradle on one end and the cable that goes to your printer on the other.
In our tests with the DYMO EL60 Labelwriter, we've found that the following cable adapter pinout worked for us:
DB9M DB9M
RX
2 ----- 3 TX
TX
3 ----- 2 RX
GND 5
----- 5 GND
DSR 6
----- 6 DSR
RTS 7
----- 8 CTS
CTS 8
----- 7 RTS
Note that most null modem cables cross over DSR and DTR instead of connecting them straight across the way we have this cable wired up. As serial printers are not all that common, we check our website for up to date compatibility information as we get it. Other printers may be able to work with off-the-shelf null modem cables.
PC Parallel Printers
Most PC printers have parallel ports on them with a 36-pin Centronics connector. For these printers, the most affordable solution is to buy an off-the-shelf serial-to-parallel adapter cable, such as the Greenwich Instruments GA945PP ($49 at www.NWT.com), which will connect older serial port-equipped Palm handhelds directly to a parallel printer.

Note that many similar adapters exist for various handhelds and will work. The Greenwich cable is nice in that it's both affordable and runs at 57600 baud. Some other cables are slower, operating at 38400 instead.
A more elegant but pricier solution is to get an Infrared adapter like the Photologic IrDA Adapter, ActiSys ACT-IR 100M, or Extended Systems JetEye.
The Photologic uses the “Infrared/IrCOMM” connection available in PalmOS 4.0+ handhelds, while the latter two use the Direct IrDA connection available on any Palm with an IR port. All three should work with most any printer equipped with a parallel port.
Chapter 8 – TealPrint-Aware Programs
TealPrint
is directly supported by many programs, including TealDoc, TealPhone, TealAuto,
TealPaint, TealMaster, ThoughManager, DayNotez, Bonsai, PrintHack, LapTopHack,
and PEdit. It is also supported by many
programming and scripting languages like AppForge.
The exact interface for printing from a TealPrint-friendly program can vary from program to program, but typically it goes something like this:
1. For direct printing, connect the Palm cable or bring its infared port in range of the printer
2. Choose a 'Print' Option from the app's menu or control screen
3. Configure options in the TealPrint settings screen, including setting text/graphics print mode
4. Click 'Print'.
5. Keep the Palm connected until printing is complete
The contents of the settings screens may vary from app to app. For most apps, you can vary the size, rotation, and appearance of the output when printing in text mode, but programs may override some settings if they have specific formatting needs, such as printing labels for established label sheets. Also, when printing in text mode, formatting and sizing are more restricted and may vary from printer to printer.
Chapter 9 – Non-TealPrint Aware Programs
When programs have not been designed specifically with TealPrint in mind, printing may still be possible using some of TealPrint's print options.

For printing graphics, use the 'Print Screen' option in TealPrint. Functioning like a camera's timer feature, this lets you set an elapsed time to start. Once you set it in TealPrint, you have time to go to the other app and go to the screen you wish to print. This option dumps the screen to the printer as a graphic page.
To print other data, you can often use the 'Print Clipboard' option instead. Most programs typically have the ability to drag-select text and copy it to the system clipboard using a 'copy' menu item. Once you do this, you can either print it directly using the 'Print Clipboard' option in TealPrint, or paste it in the 'Print Text' screen first to allow you to do some editing first.
Chapter 10 – Using Graphic Fonts
When printing text in graphics mode, TealPrint has the ability to map the text to different fonts. Since the four built-in Palm fonts are designed for the small Palm screen, they lack resolution to print nicely smooth text when sent to the printer.
Fortunately,
TealPrint supports installation of external fonts for graphics printing. Two
medium-sized fonts, Arial and Courier, are included for this purpose. Install
these .PRC files using the Palm Install Tool. Check the TealPoint website for
font packs for other fonts and a full selection of font sizes. Actual printed
font sizes are dependant on the resolution (DPI) of the graphics print mode
being used.
Since bitmap fonts can take a large amount of memory, only one font size (measured in pixels) is included in each PRC file. This font will print in different measured sizes (measured in inches) depending on the resolution of your printer. The included fonts are designed to print at a reasonable size when printed at 200-360 dpi. TealPrint can scale up fonts to print at larger sizes, but when scaled up too high they tend to exhibit 'jaggies'.
Once you have installed an external bitmap font, you can select it as your preferred default font under the graphics settings page. Note that this font style and size only applies when it is not overridden by the printing application, and that the system may re-map to a smaller font if you print a page at a scaled-down size.
Other font faces and sizes will be made available for download on our web site, subject to availability and our customer's needs.
Graphics Resolution
For best results, set the Graphics Mode resolution to an even fraction of your printer's actual resolution. For instance, if your printer prints at 360 dpi, printing graphics at 90 or 180 dpi is recommended. For a 300 dpi printer, try the 75 or 150 dpi settings on the driver. For text, you can get the fastest and best-looking results with a minimum of memory usage by printing in raw text mode.
Chapter 11 – Imbedding Images in Text
When printing text in graphics mode, TealPrint supports imbedding images into the text to create simple illustrated documents. There are two basic ways to do this without the need for a special page layout program.
TealPaint Tags
You can manually reference TealPaint images in text you print by inserting an HTML-like tag into the text. The tag refers to the image created in our graphics program TealPaint, stored in a TealPaint-format database stored elsewhere on the Palm. When you print the text containing the tag, the image will be inserted where the tag is. The tag follows the same format used by our document reader TealDoc, but must start at the beginning of a line of text. An example tag looks like:
< TEALPAINT SRC=”Pictures” IMAGE=4 SX=0 SY=0 WIDTH=160 HEIGHT=160 >
where:
· SRC is the name of the image database file as it appears on the Palm. It is case sensitive. The default database name is “Pictures”
· IMAGE is the image number in the database to include (default is 0)
· SX,SY are the coordinates of the sub-rectangle to pull from the source image (default is 0,0, which indicates the upper left hand corner )
·
WIDTH and HEIGHT are the size of the sub-rectangle to
print. (default is 160x160, which is one full screen. Change this to print only a small portion of an image or to print
an oversized one)
(Note that in this example, we placed an extra space between “<” and “TEALPAINT” to prevent TealDoc from interpreting this example as a valid tag in the doc version of this manual. In use, don’t place a space there.)
In both examples, the image is printed using the same bitmap used to render the font. Because of this, the size of the images relative to the text depends on the size of the font used to render the text. For results which most closely match the screen, use actual Palm fonts in their smallest size for the graphic text font. If the output using this setting is too small, either set the printer’s graphic mode to a lower resolution (if available) or scale up the whole image to get the desired size. The text may be “jaggier” than if you used a larger Palm font, but the images won’t be dwarfed by the text.
TealNotes
TealPrint automatically recognizes tags embedded in text placed by our program TealNotes, and will print the corresponding text from the memopad, clipboard, or other applications with the images intact if printed in graphics mode.
Chapter 12 – Printing Tips and Tricks
Aborting a Print Operation
To abort a print operation from a properly written driver, press and hold down any physical "hardware" button on the PalmPilot, such as the PAGE-UP scrolling button.
Printing in Grayscale
TealPrint supports printing color or grayscale images, dithering images to eight shades of gray in black and white printers. In order to print correctly, the images must be printed from a Palm running a version of the PalmOS that fully supports that color depth. For instance, OS 3.0 or higher is required to support 4-shade grayscale, and OS 3.3 is necessary for 16-shade grayscale. Any color device will already have OS 3.5 or higher and will print correctly in shades of gray.
Furthermore, the program generating the display must do so in the OS-approved manner. Some programs implement higher color modes by manipulating the graphics hardware directly. This allows them to function even under earlier versions of the PalmOS, but these screens cannot be screen dumped or otherwise printed. Note that some display “background” and “theme” utilities push the Palm into a grayscale mode. When running these programs, TealPrint may only print in black and white or may give unpredictable results depending on how the utilities are written.
Printing Color
TealPrint supports color graphics printing from a color Palm to a color-compatible printer with a color-friendly printer driver. As color printing modes tend to be model-specific, most TealPrint graphics drivers are monochrome only, printing color graphics in shades of gray. The TealPrint PC Spooling driver and system, however, supports color fully in either 8-bit or 16-bit color graphics modes.
Appendix A – Troubleshooting
I'm trying to HotSync print, but nothing happens when I
HotSync
Make
sure that you've installed TealPrint using the TPSETUP installer program. This setup program also installs a HotSync
conduit that automatically launches the PCSpooler on the PC when data needs to
be printed. If not, run the installer,
choose "Reprint Queue" from the driver settings menu in TealPrint,
and HotSync again.
I did that, and it still isn't doing anything.
Set your
"custom" options in the HotSync program for the TealPrint PC
Spooler conduit to "Synchronize the files". Then HotSync.
The PC spooler shows the text/graphics on screen, but
nothing goes to the printer.
Make
sure the “print to screen only” checkbox in the menu is not checked.
I'm using a direct connection. I can't print at all
Make
sure your printer is on and properly connected and that your printer driver
settings match your cable and connection. If this still does not work, run the
printer driver directly from the applications menu, and print a test page
directly from the driver to check the connection and settings. If you are using
a parallel printer converter cable, your serial settings must match what the
cable was designed for.
It printed before. Now it doesn't
If
you're running a paralled converter cable, try disconnecting the cable
temporarily from both the printer AND the Palm and waiting a few seconds to let
the converter circuitry reset itself.
Graphics are not showing up
Make
sure you have your settings set to "Print as Graphics" and that your
printer and printer driver both support graphics and are correct for each
other.
All I get is graphic junk when sending graphics
Make
sure your printer driver is correct for your printer, that your transfer speed
set in the driver is correct.
When trying to HotSync-print I run out of memory
When
HotSync printing, the buffered data is dumped to a temporary file for transfer
at the next HotSync. This file can be quite sizeable, especially for graphics
printing. If printing text, try printing in text mode, which takes less space.
Otherwise, you'll need to decrease the size of the page being printed, lower
the resolution, or delete files and data off the Palm to free up more memory.
When printing raw text, most of the text is fine, but
European characters are coming up as funny symbols.
Your
printer may use a different character set for European characters. Check your
printer driver settings. If it supports different character sets, try switching
to another character set if this is changeable from the the printer’s front
panel or rear DIP switches. For example, PCL printers default to using the PC-8
font set, which contains most European characters, but some only in lower case.
I sometimes get junk or missing/wrong characters when
printing through a serial or parallel connection.
Try
printing using a "Send Slow" and/or hardware (CTS) handshaking driver
options, if available.
When I try printing to an IR printer, the connection just
times out
Make
sure the printer driver is set up to communicate in Infared rather than serial.
Turn on status display option in the driver’s settings screen--if
available--to further diagnose the problem.
Sometimes, pages in the middle of a print job don’t get
printed or get printed incorrectly.
Check
your cabling or connections to make sure it is handshaking properly with the
Palm. In addition, some printers may
require some recovery time between printing pages. If this is the case, set the “Manual Feed” option in the Paper
select dialog.
Appendix B – Revision History
Version 2.10
– November 25, 2008
·
Fixed
PCSpooler finding of default printer and potential crash under Vista
Version 2.08
– April 5, 2007
·
Fixed
printing of imbedded TealPaint(lores) the TealNotes images
Version 2.07
– May 30, 2006
·
Added
ability to print selected todo task entries by due date
·
Added
support for printing enhanced Memos database on new devices, supporting memos
> 4k
Version 2.06
– May 23, 2006
- Fixed crash when printing
externally using certain programs such as TealDoc or TealTracker
Version 2.03
– May 2, 2006
- Added desktop conduit to
automatically launch PCSpooler during Hotsync if spooled data is available
- Added scaling of print
preview on PCSpooler to better reflect image as printed on an 8.5 x 11
sheet
- Added Hotsync Spooler
and ASCII text built-in drivers (replacing separate driver files)
- Added or improved 5-way
navigation on all program screens
- Improved font mapping on
PCSpooler to correctly render page in Pica Courier font
- Improved
"reprint" option in PCSpooler to optionally print jobs from
previous sessions
- Fixed crash bringing up
menu on "Print Text" screen
Version 2.01 – November 28, 2003
- Fixed printing of
monochrome screens (less than 8-bit) on OS5 devices
Version 2.00 - August 17, 2003
- Added compatibility
with OS5
- Added Palm
high-resolution screen dump support
- Added hires icons for
program and drivers
- Added 16-bit color
printing support thru HotSync Spooler
- Added new vastly
reworked and improved program interface
- Added numerous help
screens where needed
- Added text/graphics
printing mode selection to main screen
- Added manually
selectable font size in graphics options
- Added persistence of
text to 'print text' screen
- Added high-resolution compatibility
to all drivers
- Added Extech MSTIV and
2000/3000T drivers
- Added option in PC
Spooler to save printed graphic-mode jobs to BMP file
- Updated all printer
drivers to new interface
- Removed duplicate nag
messages
- Fixed timeout when
printing via infrared to some printers
- Fixed intermittent
crash printing certain images in PC Spooler
- Fixed restore of
background screen after printing
- Fixed to-do category
list overflow display problem
- Fixed cropped address
entry display problem
- Fixed background
restore on hires devices after nag message
- Fixed intermittent
crash listing memos or addresses for printing
Version 1.62 May 18, 2001
·
Fixed HotSync spooler working with Palm Desktop 4.0
·
Updated to print data from latest standard database when multiple
databases are present
·
Fixed Crash printing virtual more than one image from
TealPaint
·
Increased printing speed
·
Added support for new driver for SiPix Pocket Printer
·
Added IR support to DYMO label printer driver for IR/serial adapter
·
Fixed status bar display in drivers when running on Handera
·
Enhanced IrDA in drivers for compatibility with case-sensitive
devices
·
Renamed driver "margin" parameters to "Offset"
for more clarity.
Version 1.60 May 4, 2001
·
Buffered IR output in drivers for vastly improved printing speed
·
Reduced memory usage for compatibility with Thoughtmanager
Appendix C – Contact Info
TealPrint by TealPoint Software
©1999-2008
All Rights Reserved.
TealPoint Software
454 Las Gallinas Ave #318
San Rafael, CA 94903-3618
Please visit us at www.tealpoint.com, or
email us at contact@tealpoint.com.
We
look forward to hearing from you.
Appendix D – Registering
Registering allows you to use the program
past the 30 day expiration period and turns off registration reminders.
Currently, you may register by snail mail
or online with a credit card and a secured server from the store where you
downloaded the software. For the first
option, send the following information on a sheet of paper separate from your
payment.
·
Product Name
·
E-Mail Address
·
HotSync User ID (Pilot Name Required for
Passkey generation. It can be found on the main screen of the HotSync
application on the Pilot as "Welcome ________" or in the corner on a
PalmIII or higher)
·
Check (drawn off a US Bank) or Money Order
for ($19.95 US). No international
checks or money orders please.
Appendix E – Legal Notice
We at
TealPoint Software are committed to providing quality, easy-to-use software.
However, this product is provided without warranty and the user accepts full
responsibility for any damages, consequential or otherwise, resulting from its
use.
This
archive is freely redistributable, provided it is made available only in its
complete, unmodified form with no additional files and for noncommercial
purposes only. Any other use must have prior written authorization from
TealPoint Software.
Unauthorized
commercial use includes, but is not limited to:
§
A product for sale.
§
Accompanying a product for sale.
§
Accompanying a magazine, book or other
publication for sale.
§
Distribution with "Media",
"Copying" or other incidental costs.
§
Available for download with access or
download fees.
This
program may be used on a trial basis for 30 days. The program will continue to
function afterwards. However, if after this time you wish to continue using it,
please register with us for the nominal fee listed in the program.
Thank you.
CUSTOMER LICENSE AGREEMENT
YOU ARE ABOUT TO DOWNLOAD, INSTALL, OPEN OR USE
PROPRIETARY SOFTWARE OWNED BY TEALPOINT SOFTWARE, INC. CAREFULLY READ THE TERMS
AND CONDITIONS OF THIS END USER LICENSE BEFORE DOING SO, AND CLICK BELOW THAT
YOU ACCEPT THESE TERMS.
1. License. You are authorized to use the Software
Product owned and developed by TealPoint Software, Inc. on a single hand-held
computing device on a trial basis for thirty (30) days. If after 30 days you
wish to continue using it, you are required to register with TealPoint and pay
the specified fee. This license is not exclusive and may not be transferred. You
may make one copy of the Software for back-up and archival purposes only.
2. Ownership. You acknowledge that the Software
Product is the exclusive property of TealPoint Software, Inc, which owns all
copyright, trade secret, patent and other proprietary rights in the Software
Product.
3. Restrictions. You may NOT: (a) decompile or
reverse engineer the Software Product; (b) copy (except as provided in 1 above)
sell, distribute or commercially exploit the Software product; or (c) transfer,
assign or sublicense this license.
4. Disclaimer of Warranty and Liability. TEALPOINT
MAKES NO WARRANTY, EXPRESS OR IMPLIED, AS TO THE ACCURACY, COMPLETENESS OR
FUNCTIONING OF THE LICENSED SOFTWARE, INCLUDING WITHOUT LIMITATION, WARRANTIES
OF MERCHANTABILITY OR OF FITNESS FOR A PARTICULAR PURPOSE, ALL OF WHICH
TEALPOINT DISCLAIMS. ALL LIABILITY IS DISCLAIMED AND TEALPOINT ASSUMES NO
RESPONSIBILITY OR LIABILITY FOR LOSS OR DAMAGES OF ANY KIND, DIRECT OR
INDIRECT, INCIDENTIAL, CONSEQUENTIAL OR SPECIAL, ARISING OUT OF YOUR USE OF THE
LICENSED SOFTWARE, EVEN IF ADVISED OF THE POSSIBILITY THEREOF.
5. Termination. You may terminate this Agreement at
any time by destroying your copy(ies) of the Software Product. The Agreement
will also terminate if you do not comply with any of its terms and conditions,
at which time you are required to destroy your copy(ies) of the Software
Product and cease all use.
6. Applicable Law. This Agreement is governed by the
laws of the State of California.